![]()
Coach Andy Wants you to Know!
What the Seven Steps are:
The Seven Steps are a method of teaching the fundamentals of the pitching delivery and a basic "Frame-by-Frame" view into how a baseball is effectively delivered.
The Seven Steps maximize the velocity of the baseball while efficiently utilizing the pitcher's effort.
The Seven Steps are a method that the pitcher and pitching coach can communicate to get the most out of the pitcher, the pitcher's arm, the pitcher's body and the prevention of injury.
The Seven Steps can transform a beginner into a consistent young pitcher or fine-tune an experienced pitcher to reach the goals he has set for himself.
The Seven Steps are to be used as a tool away from game situations to repeatedly teach the pitcher how to have a smooth delivery.
The Seven Steps are one of several homework drills to make the necessary changes to pitch at the next level.
What the Seven Steps are NOT:
The Seven Steps are NOT meant to make all pitchers look or pitch alike. All pitchers will look differently and deliver differently. The Seven Steps are a basis for understanding how the body should assist during the delivery.
The Seven Steps are NOT the meant to be used in game situations. They are a sequence of events that the pitcher must pass through during his motion.
The Seven Steps are NOT the only way to pitch. They are a proven method to teach proper delivery and the fundamentals of pitching.
The Seven Steps are NOT meant to create a delivery that is choppy or causes the pitcher to stop at any time during the delivery. Proper repetition of the Seven Steps and then developed into a smooth-flowing motion without "jerkiness" or "kinks" is how the Seven Steps are perfected for game-day use.
The Seven Steps are NOT the only action that a pitcher must do to become better. They are a starting point to start a lifelong dedication to getting the most out of the body that God has given you!
![]()
Coach Andy is distributing both the pictures of The Seven Steps and the written theory of what makes up each Step. This information is straight from the manuscript of the book. Each of the boys you see are successful pitchers that have dedicated themselves to hard work, long hours and a desire to pitch at the next level. The boys you see here are no different than you or your young pitcher. The book Seven Steps of Pitching is filled with much more than what you see here. Get your copy TODAY!
- Step 1:
-
Step 1 is "A Little Step Back" Click to View Theory.


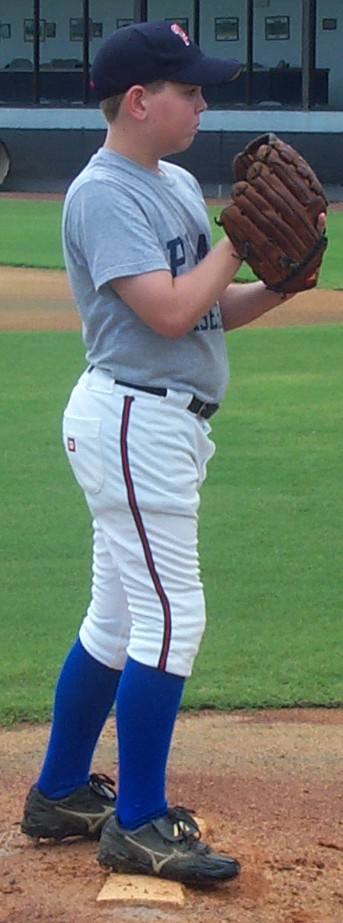

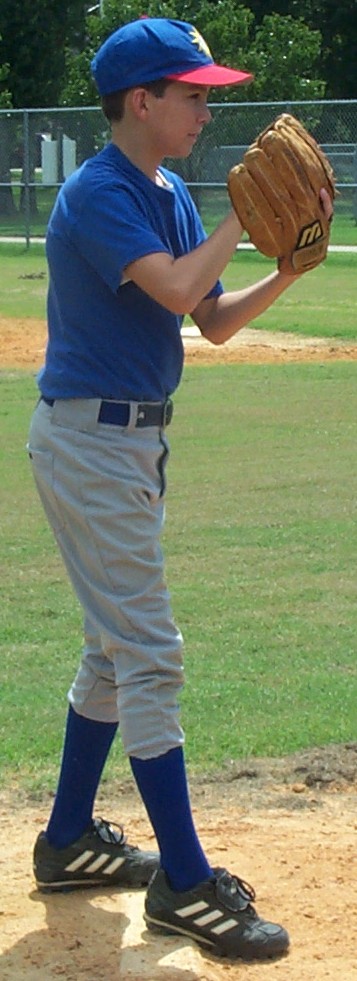


- Step 2:
-
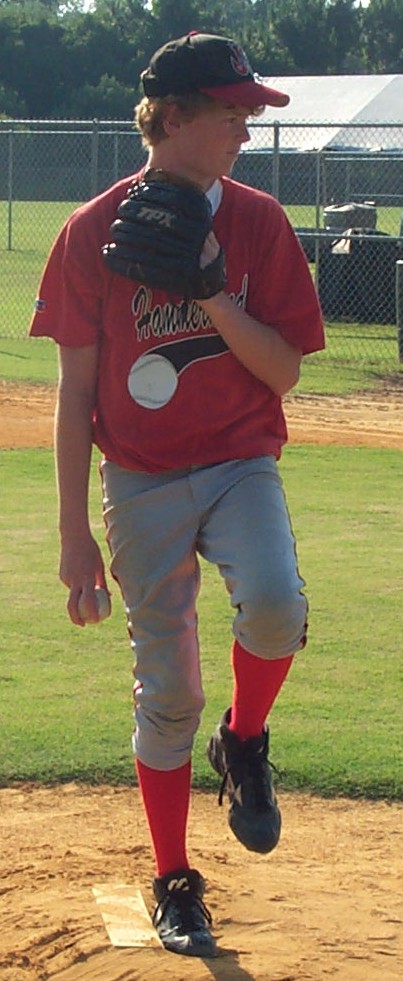
Step 2 is "The Pivot" Click to View Theory.
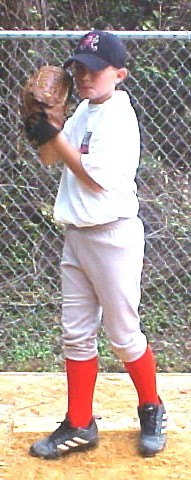
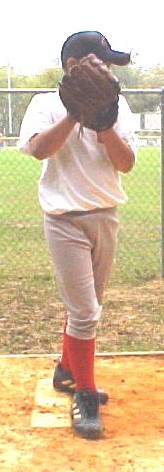

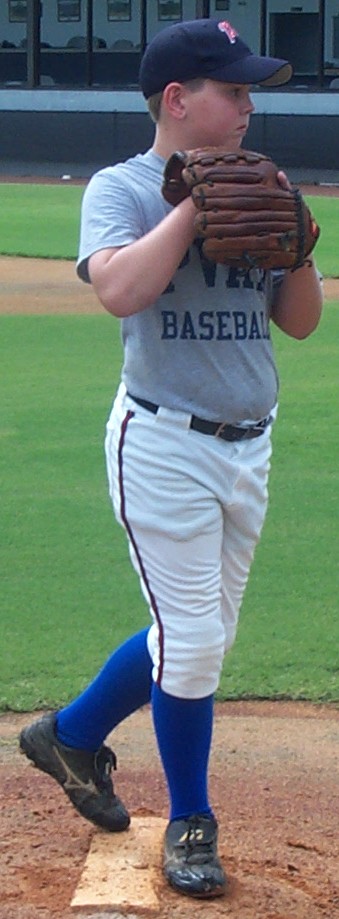
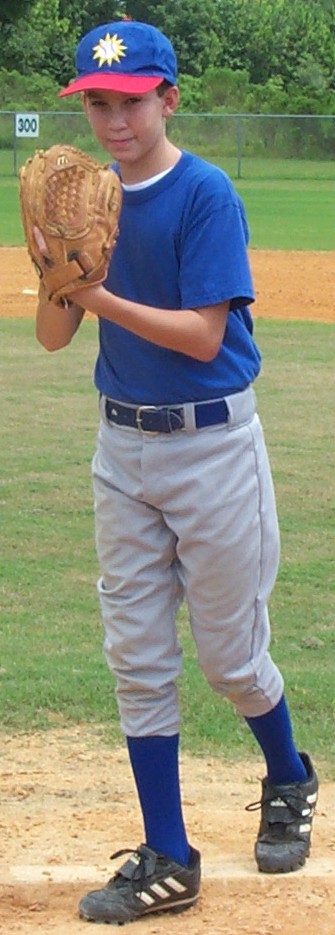
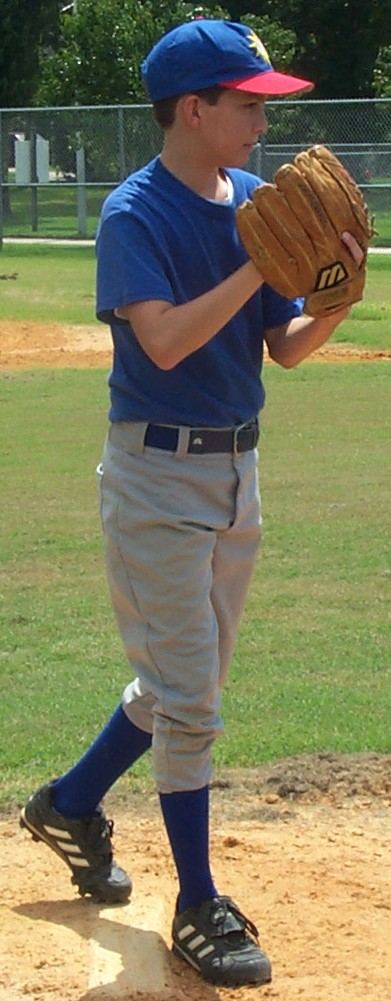
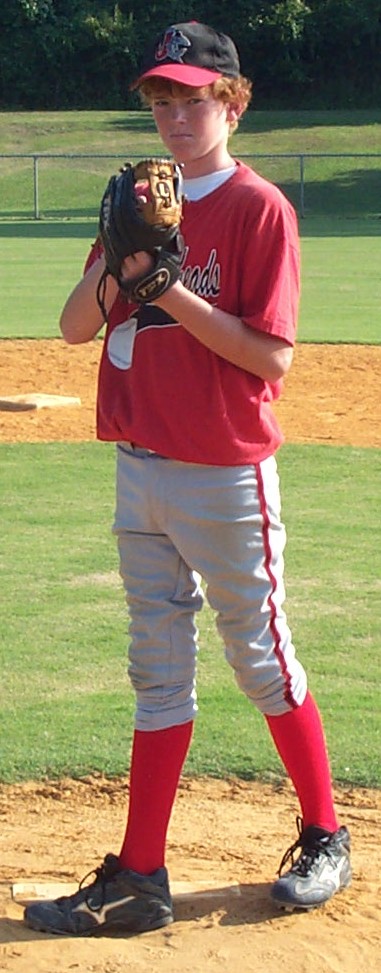

- Step 3:
-
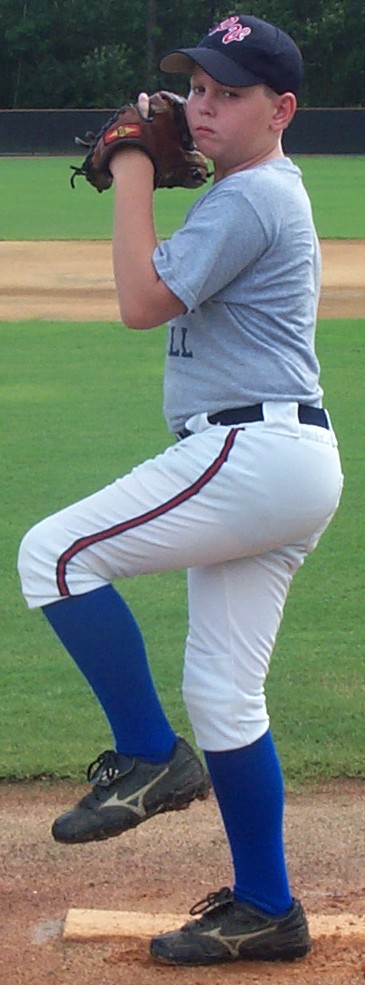
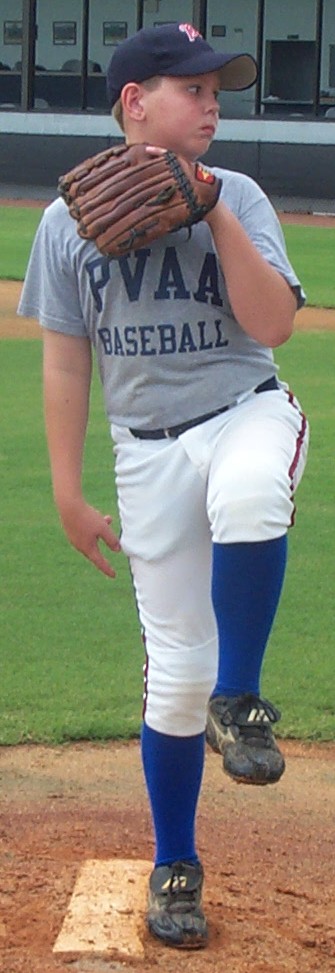
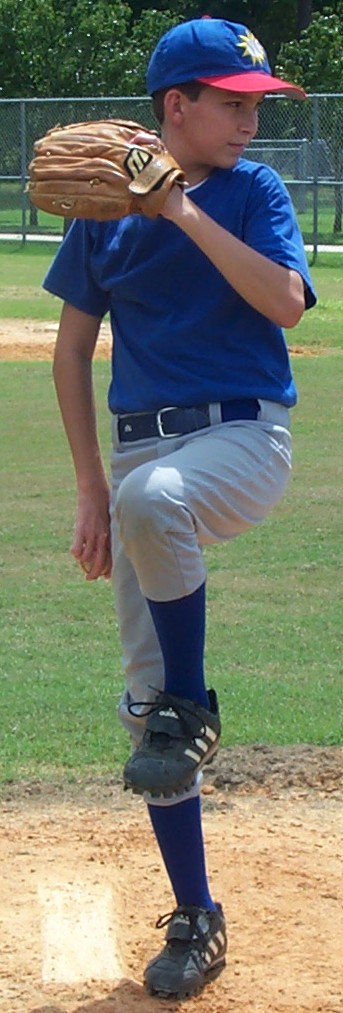
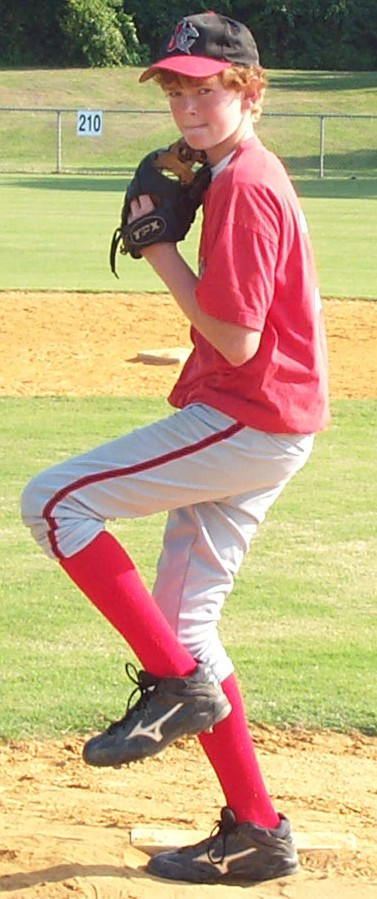
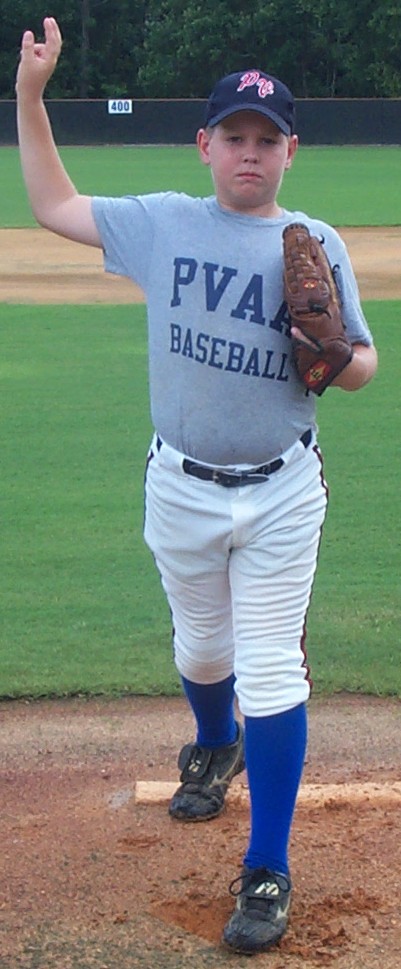
Step 3 is "The Balance Position" Click to View Theory.
- Step 4:
-
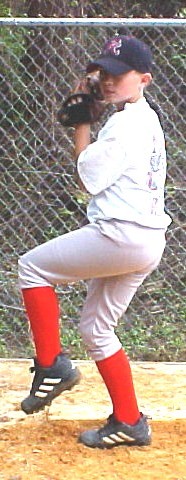
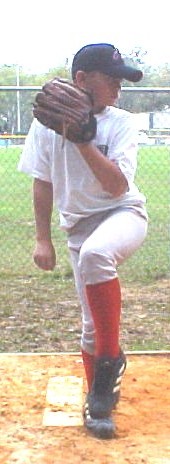
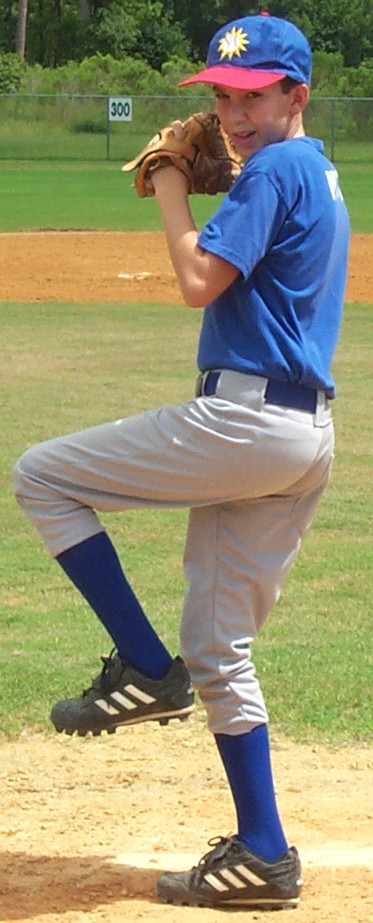
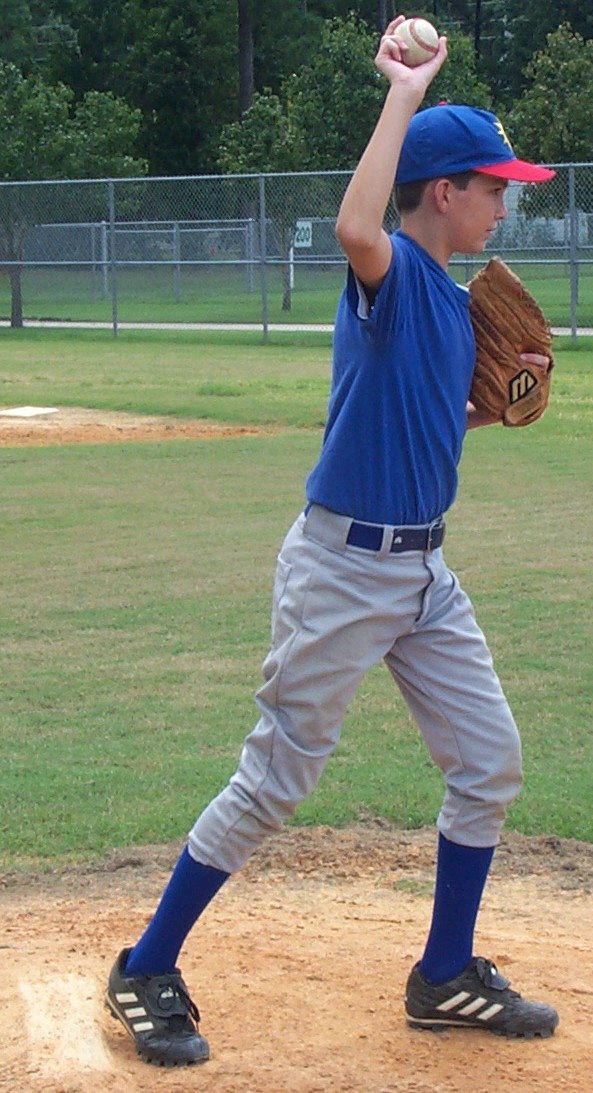
Step 4 is "The Power Position" Click to View Theory.
- Step 5:
-
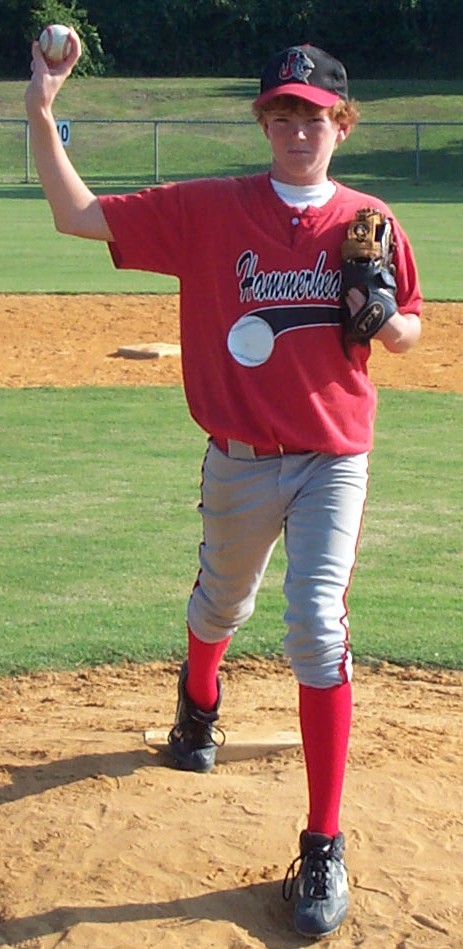
Step 5 is "Test the Water" Click to View Theory.


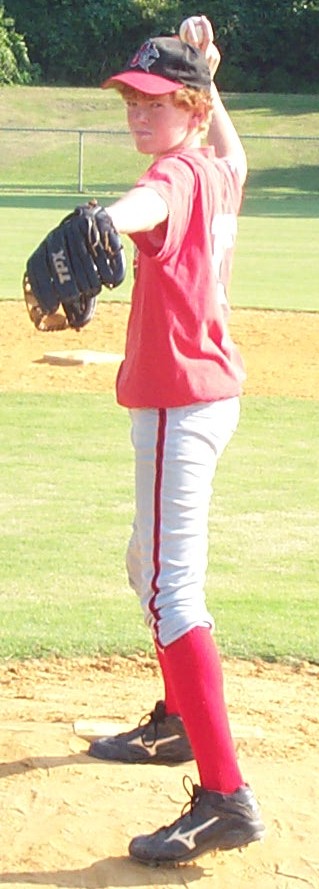
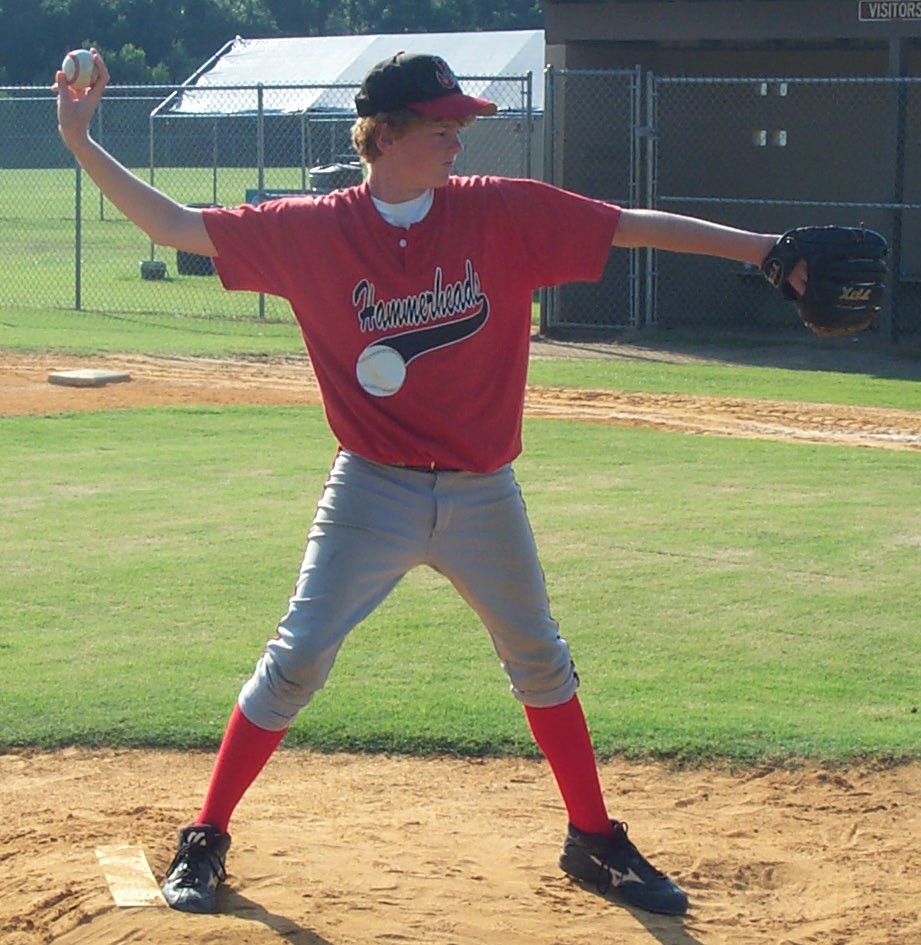
- Step 6:
-
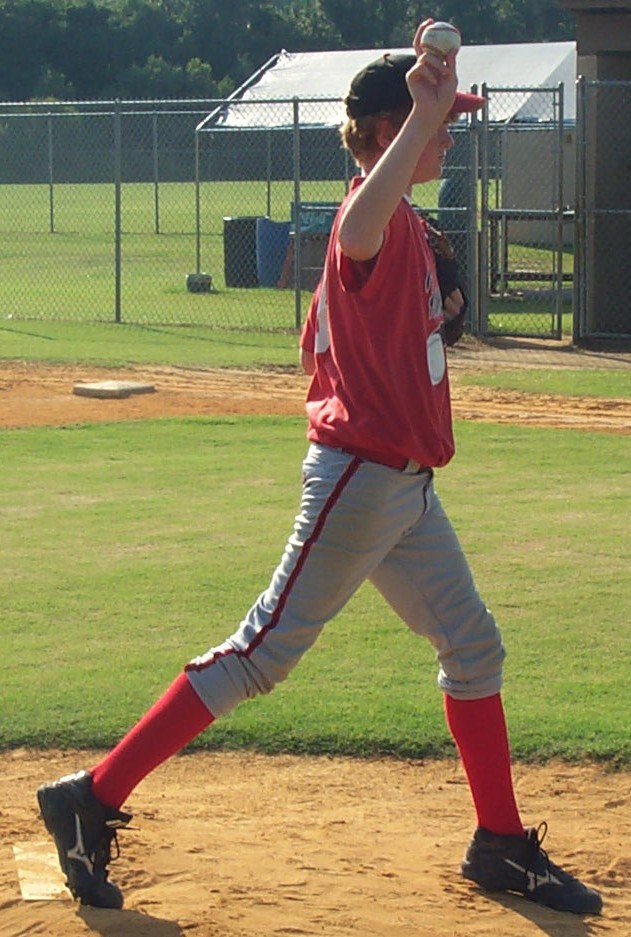
Step 6 is "Pull the Rope" Click to View Theory.
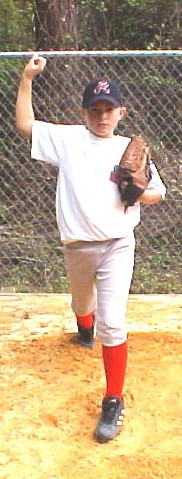
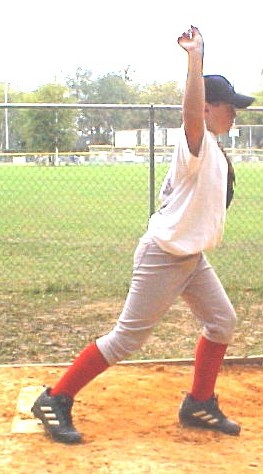


- Step 7:
-
Step 7 is "Cut in Half and Finish" Click to View Theory.
The Seven Steps - Condensed
This chapter was added to allow you to read over and over again the Seven Steps for practice time. If you are sharing the Seven Steps with someone else or your pitching staff, you won't have to read all of the extra information that I added as "Behind the Scenes" concept information. This chapter will only include the Steps and the body positions within them. I suggest that this not be the chapter that you read first. The conceptual information is far more valuable then just what position you are in. If we were all robots, (look-a-like pitchers), then just the positions would be necessary. But due to our uniqueness, we must know the "why" behind the "what" in order to apply the Steps to our lives.
Setting up to Pitch
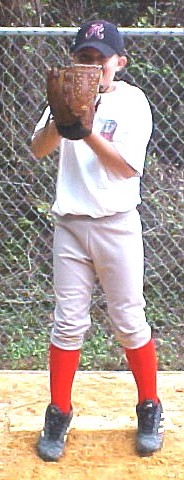
We want the toes or balls of your feet hanging over the front of the rubber.
Your weight should not be on your heels, but slightly forward, on the front
of your feet. Your feet should not be touching each other. They should be
spaced apart enough that you could fit another shoe between your own feet,
(a minimum of 4 inches). Where on the rubber you stand is not as important
as where you end up in Step Two. Wherever you stand, we will want you to have
your toe even with the end of the rubber when you get into Step Two, or The
Pivot.
Point your glove hand fingers to the sky. We want your arms to be relaxed, no tension in them. When the arms are relaxed and the fingers are to the sky, our coaches always wanted the heel of the throwing hand touching the heel of the glove. I have found that it is not necessarily so important to have them touching as to have them lined up.
Some pitchers want to be turned slightly on the rubber; this is perfectly fine. Remember that we want you to be comfortable. I turned slightly toward my throwing side in order to make "The Pivot" easier and smoother.
Step One
Step One is a little step backward. For those that are turned to the side
slightly, make sure that you step directly backward in the direction you are
turned. You want the step small enough that you do not allow your weight to
keep you from coming back forward for Step Two. You want your weight to shift
back far enough to remove the weight from your front foot. This will allow
for an easy pivot in Step Two. View Pictures.
Step Two
When your weight was shifted backward in Step One, you should have been slow,
under control, and relaxed. Step Two is about to set you up inside the walls,
in a semi-closed position that will remain closed until the delivery.
Step Two is The Pivot. So, you rocked back in Step One, now you will rock
forward, under control, into a closed position in relation to the plate. Your
weight will rock forward during the Step to set your weight up over your back
or pivoted foot. Slide your pivoted foot along the rubber to the far end in
the direction you are facing. You should be able to look down and see that
your body's weight is centered over the inside of your back leg and inside
of your back foot. When you rock forward, you will turn your hips slightly
closed to the plate, but not entirely closed. Stay comfortable here; you will
be keeping your weight in this position through Step Five. Your back foot
that you rocked back onto will now not be supporting any of your weight. In
fact it will remain unmoved, but will be up on the toe. When you rock forward
into Step Two, you will bring your heal with you, but keep the toe on the
ground for this Step.
Your hands will roll from the in front position to your back shoulder. The
glove should always remain on top of the ball and stay in the shoulder-chin
range. Make sure that your throwing fingers remain on top of the ball, as
we will discuss grips in another chapter.
In Step Two, your shoulder will rotate closed with your front shoulder almost pointing towards the plate. Be careful not to over-rotate closed where you would be allowing your back or the numbers on your jersey to be seen by the catcher. This type of over rotation is common. When you rotate from Step One to Step Two, be very careful to do this slowly and under control. View Pictures.
Step Three
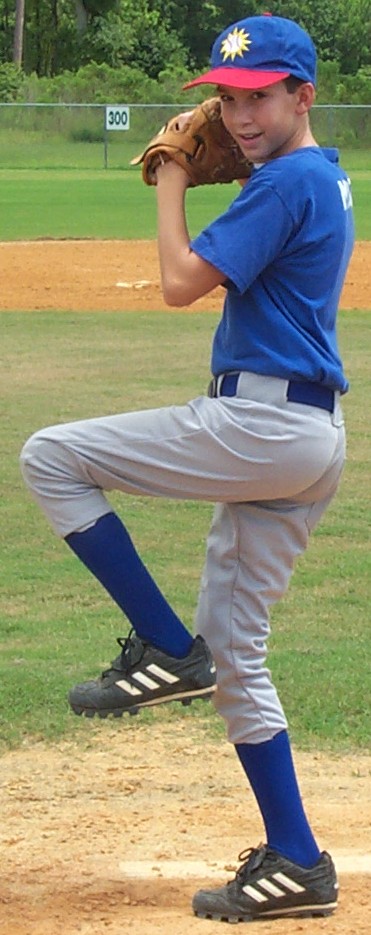
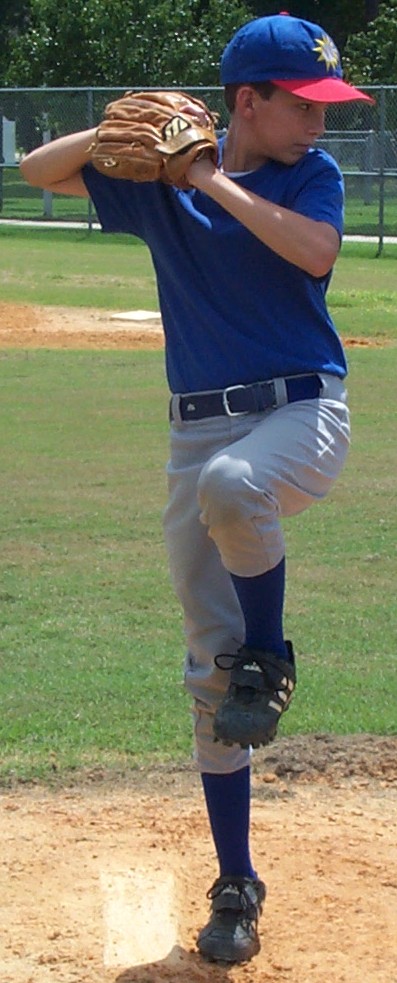
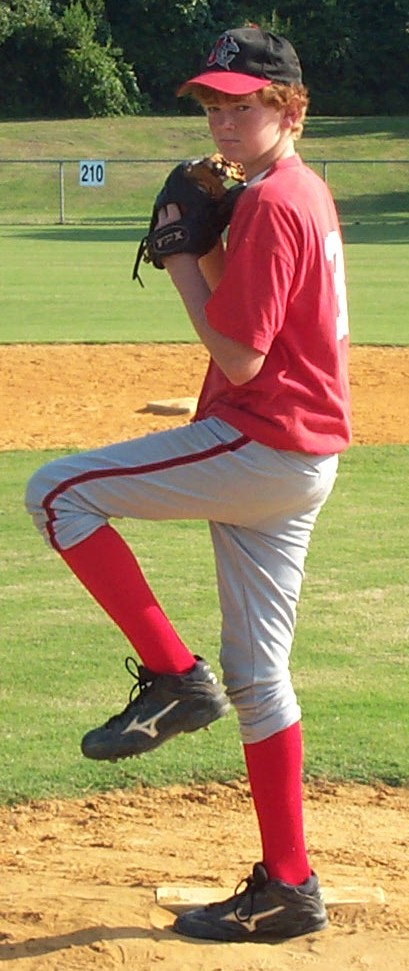
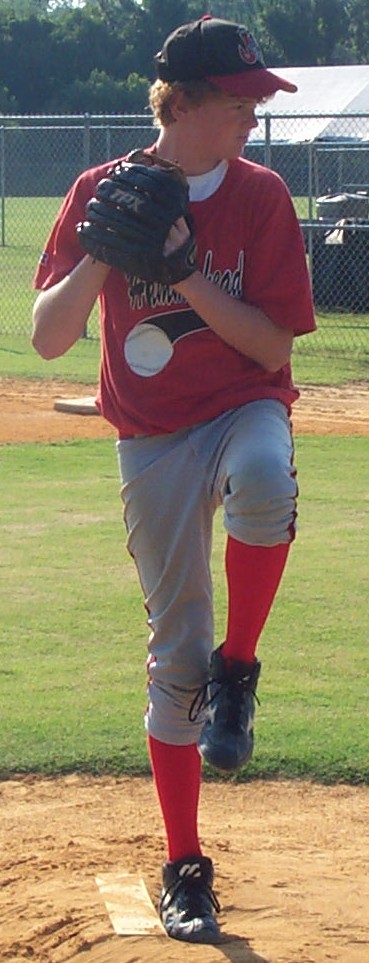
Step Three is the balance position. The balance position is the most important
step to keep your body under control. The position is exactly what it sounds
like…balance. If you do not have proper balance, you will surely know
it from this Step.
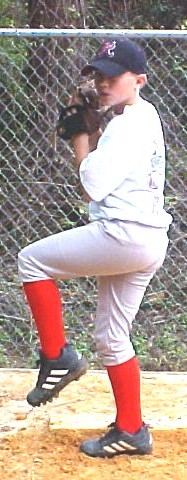
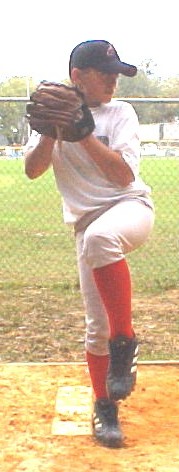
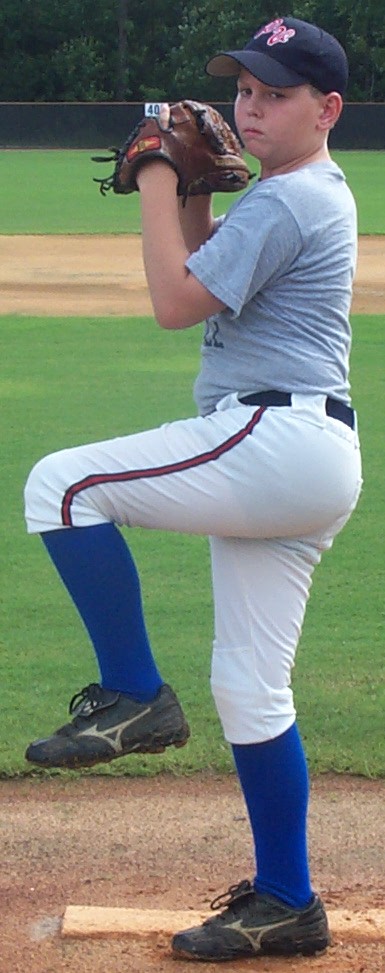
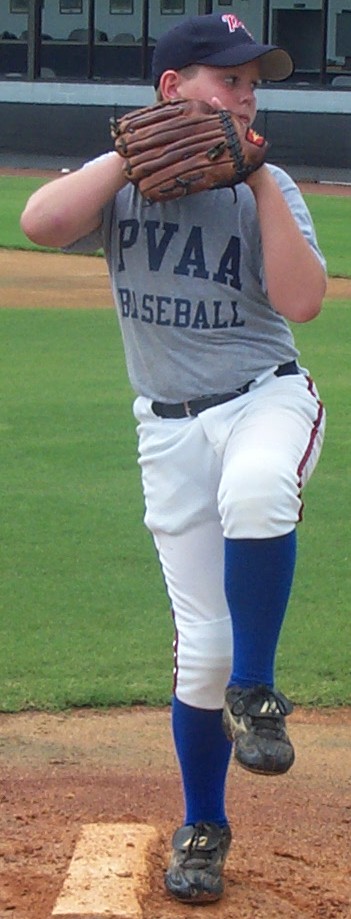
When coming from Step Two, you have set your weight up on the inside of your back foot and leg. Your hands are now located beside your back shoulder and your front shoulder is facing the plate. Your back foot is now up on the toe and your hips are turned slightly closed to home plate. Now we are ready to start the heart of the delivery.
While keeping your shoulder closed to the plate, bring your front leg up toward your belt. You need to be very careful that the leg swing does not carry your weight outside the walls. Be under control and take it slow, there is no need to rush this step in practice or game. Try to feel yourself lifting the leg as if you had a rope attached to your knee. Allow your foot and lower leg to just hang and go along for the ride. If you lift with only your knee there will not be any weight shifting or falling outside the walls. Another important note is that the more body parts that you can keep relaxed and just floating along for the ride, the better. When you throw a lot of pitches on any given day, you will want every ounce of energy that your body can give you. Remove the tension out of your lower leg here and concentrate on balance.
Now, back to Step Three. You have brought your kick-leg up to belt high, with everything below the knee relaxed. The main goal in Step Three to keep your weigh under control, closed to the target and weight back on the back leg, without any momentum carrying you down the mound.
In order to set the optimum amount of your weight on the back leg, or drive leg, you should direct your kick leg or knee toward the rear slightly. What you will feel is that you are a bit twisted at first. Remember that you should not rotate your front shoulder closed, past pointing it towards the catcher. Your kick leg will be slightly past this closed position. For right-handers, we ask them to point their kick knee toward the shortstop, left-handers to point their knee toward the second baseman. The easiest way to learn how this feels is to think about showing the catcher the closest pocket on the seat of your pants. If you keep your shoulder pointed and show some rear pocket, then you will need to slightly cock your hips backward to get into this position. At this point, you have set up absolutely every bit of weight that you can on your back, or driving leg. The more weight that you can set up on the back leg, the more momentum that will be available during the drive toward the plate. Also, if you keep your weight back, you will be able to maximize your dive leg, due to it not being extended when you need it.
In Step Three, your hands will continue to roll back to completely set up adjacent to your back shoulder. Your glove will be open to the ground with your hand gripping the ball with fingers on top of the ball. As we will discuss in another chapter, it is very important to keep your fingers on top of the ball. You should keep a comfortable distance between your hands and your chest. If you keep them too close to your chest, then you will have a greater tendency to push your hands out in Step Five, thus getting outside your walls. Likewise, if you hold your hands out from your chest too far in Step Three you may have a tendency to not only be outside the walls now, but to sweep your glove laterally in Steps Five and Six.
Lastly for Step Three, you should feel like your chest weight is leaning very slightly over your toes. Not as much as to set up a lean, but to make sure that you are not falling backward. View Pictures.
Step Four
Step Four is the power position. You are holding your Step Three, ready for
a good drive to the plate. Your back leg will bend from the extended position
of a tall, proud Step Three to a strong, compact, almost tense position ready
to explode toward the plate. The knee will not move out, away from the pitcher,
but move slightly forward toward home plate. If you were to move your knee
out from you, you will not get maximum drive from the leg muscles. Getting
the knee slightly down the hill, (and I do mean slightly, 2-3 inches maximum),
places it in a position with greater leverage toward the plate. You will now
feel weight on the balls of your planted foot roll toward your big toe.
Now we get to break our hands. Keeping the glove set up over the back shoulder, fingers on top of the ball, separate your hands by moving the ball down your back leg. We made up the little saying, (in order to name this motion), of "Thumb down the Thigh". This sets up a big, sweeping, free flowing arm swing. This is one item that scouts look for in a pitcher is for him to have an arm swing that doesn't have hitches, or kinks, or corners. Arm swings will be round, smooth and free flowing. For Step Four, only start the arm swing with taking the ball straight down your back leg to the thigh. Your fingers will remain on top of the ball, always in command of the pitch.
Many pitchers feel that they need to get really small and compact in this Step. This is simply not the case. You will notice a slight drop in your height during Step Four. You want to feel that your leg is moving from stiff to strong. Not more than a couple of inches though. Whatever height you lose in only making that adjustment is the extent of your drop. We want our pitchers to use every bit of the height that God gave them. We want pitchers to remain proud and be able use the leverage of height during the pitch. Pitchers that lose a lot of height here have tendencies to rise during the following Steps and it creates a roller-coaster effect to the delivery. Any more drop than this and your body will rise again when driving toward that plate. In your drive, you will rise again in order to get the maximum leverage when cutting the target in half in Step Seven. View Pictures.
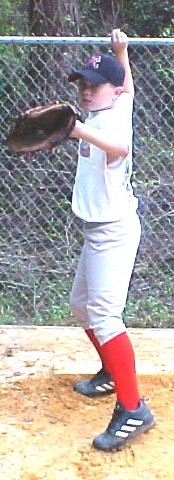
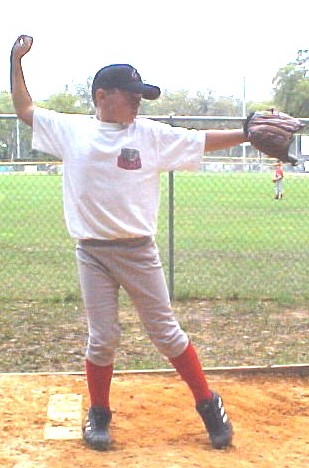
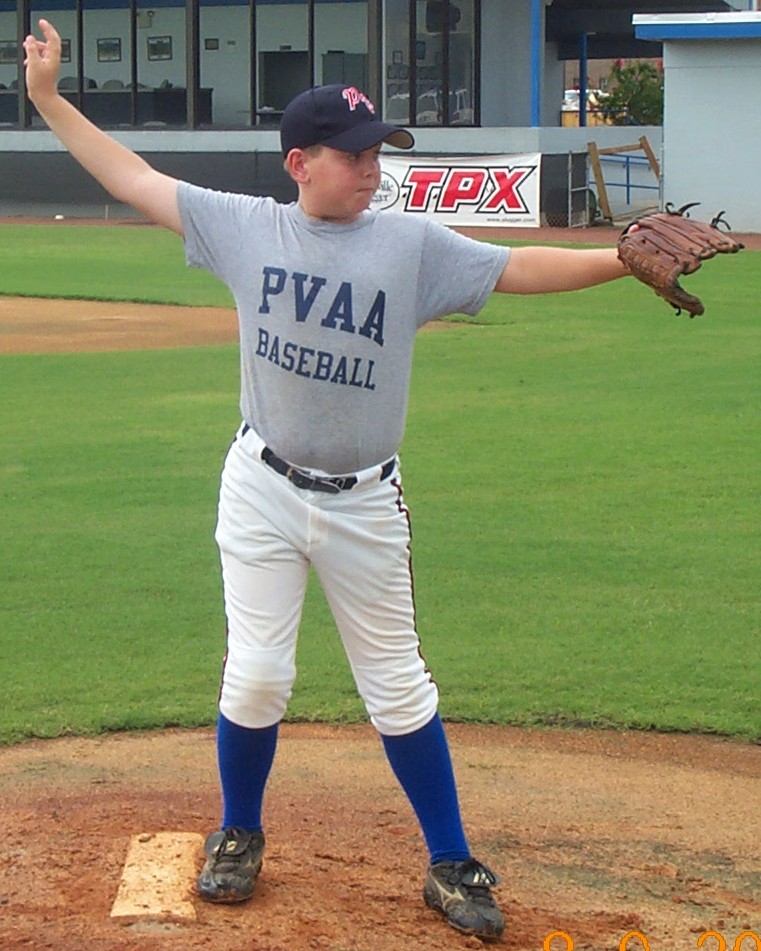
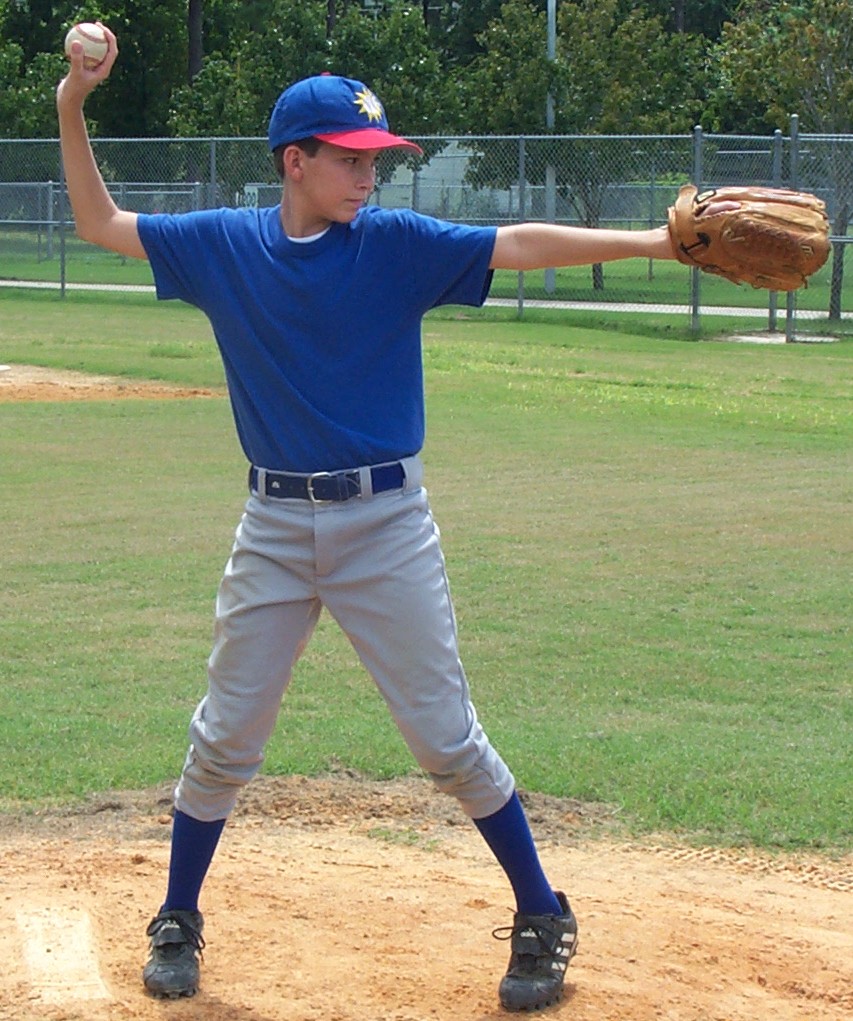
Step Five is Test the Water. Let's start with the arms. Atlanta Braves Pitching Coach, Leo Mazzone, teaches his pitchers something called the "T". He asks that his pitchers get both elbows as high as the shoulders during the pitch to create a position that resembles a "T". This is a great concept that we should adopt today. To hold the arms, elbows, and hands at the height of the shoulders can really help with power, consistency and winning. For the pitching staff of the Atlanta Braves it is easy to tell those professionals to get their arms into the "T" and to then get their throwing hand higher for the actual delivery. This concept is quite confusing to younger pitchers, so we simplify this concept. We want the arms to get into, what I call, a Modified "T". This Modified "T" actually has both elbows as high as the shoulders, but it raises the throwing hand to a higher position. Let's go through the individual motions of the arms in Step Five.
The back arm will go from Step Four of "Thumb down the Thigh" into a fluid, smooth-sweeping, fully extended arm swing all of the way up to shoulder height. When the arm gets to shoulder height, the elbow and bicep portion will stop sweeping upward and the lower portion or forearm will continue up into a 90-degree position. In this position, you will notice that the bottom of the elbow is as high as the top of your shoulder. In this position, you will see that your throwing arm wrist is higher than your head. Your fingers will always be on top of the ball. From Step Three, Four, Five, Six and Seven, the fingers will be on top of the ball or "In Command" of the ball for the delivery.
Now that we are in what I call the 90-degree position, we need to add a couple of items to this. Our forearm is straight up in the air, with the ball facing center field, away from the catcher. Our wrist is in a neutral position, not flopped inward toward your head and not flopped outward toward center field. We want your wrist to be in a strong, but relaxed, neutral position. If there is too much tension here, we can lose a lot on our fastball and also loose some stamina. I'd like to get the point across that it is not necessarily important for the pitcher to think about the ball facing centerfield, but to have the thought of the ball always facing away from his heart. This will be more important when we transition into Step Six.
Now, for the front arm. There are a couple of ideas for the use of the front arm in Step Five. Both concepts are good, but I am partial to the one that I used. We called it "Pulling the Rope". The other method is the "Shark's Fin". As I mentioned before, I encourage pitchers to teach me what they are taught so that I can continue learning. At The University of Alabama, we were taught the method of Pulling the Rope. At Florida State University, Coach Mike Martin teaches the Shark's Fin. Both methods have an equal goal, to place the front arm in a strong position to help accelerate the upper body to the plate.
"Pulling the Rope". We take the glove from Steps Three and Four where it was comfortably placed out from the back shoulder and we take it forward toward the catcher. The elbow will remain as high as the shoulder and the glove will stay that high as well. We want the arm extended toward the catcher as if to grab an imaginary rope that is attached to the catcher. In Step Six, we will pull this rope to accelerate our upper body in that direction. We want the palm of our glove hand to be open to the catcher with the thumb pointing downward. This will keep the front shoulder closed throughout Step Five. The elbow will be slightly bent in order to keep the glove on the chest side of our body. One of the worst things we can do in pitching is to allow the front side to open up too early. This concept is a lot like hitting. Important to note is that when the glove is extended out, we call this "the sights of the gun". We want the pitcher to be looking right over the top of the glove to the target.
"Shark's Fin". We still take the glove from Steps Three and Four where it was comfortably placed out from the back shoulder and we take it forward toward the catcher. The elbow will remain as high as the shoulder but the glove will go up until the front arm is in a position that looks like you are flexing your bicep. The glove is facing backward toward yourself slightly on the chest side of your body as well.
We have taken care of the upper body for the most part except for the chest area. We want the chest to be leaning over your toes very slightly. Be very careful to not get outside the walls, we just don't want any body weight to be on our heels, but on our toes.
From the lower body is where we get the name "Test the Water". If I asked you to check the temperature of a pool or lake with only your big toe on your front foot, what would you look like? You would keep your weight back on your back leg and reach your toe out to feel the water. If you put any weight out there with your toe, you would fall in right. We need to keep our weight back in order not to fall in. Well, Testing the Water is the same concept. We keep our weight in the same position from Step Three, through, Step Four, and in Step Five. You will notice however, that our belly button has never moved from Step Three, where it was located above the back foot's toe. The belly button remains here from Step Three through Step Five.
With our weight and back leg taken care of, let's move to the front leg. We want the leg to drop from its Step Three and Four position of as high as the belt and move straight down and then out toward the catcher. The leg will reach out toward the catcher until it touches the ground. Do not try to reach the foot out as far as a normal pitch. In order to grasp the concept of what we are trying to learn, it is more important we keep our weight back here to get adequate front leg reach. Just allow it to extend out until it touches the ground or the imaginary water. The foot will be closed to the plate, not pointing toward it. We want to accentuate this closed position in order to help keep our weight back and body loaded for an explosion. The toe of your foot will be the only part to touch the ground, not the entire foot. When pitching, the entire foot will eventually be planted on the ground, and we will learn how in Step Six.
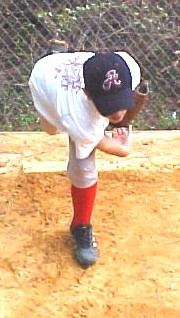
Our front side is closed in four places now. It is closed at our front shoulder, our hip, our front knee, and our foot. It is important to allow pitchers to feel this closed position; it helps to keep the weight back and the slightly compacted position before the explosion. View Pictures.
Step Six
Step Six is Nose over Your Toes. In this Step, we move from the loaded position,
forward, by driving the back leg. The first thing that we do is to grab that
imaginary rope with the glove hand and pull ourselves toward the target. Pulling
the rope does a couple things for us. First and foremost, it accelerates our
upper body. Secondly, pulling the rope keeps the glove in the front of our
body upon completion of the delivery. When we pull the rope, we pull it directly
to our chest.
Especially with younger pitchers, I find that they are extending their arm toward the catcher well, but lack in the pulling or accelerating. They tend to get the arm out there, but just allow it to fall when moving forward in the throw. At that time we stress again to pull the rope and to accelerate the front side of our body. They need to pull the rope all the way back to the chest, and hard! This practice of pulling the rope should overlap into every position played. From warming up before a game, (warming up for any position, I might add) to just playing a little toss in the front yard to actually pitching for power, Pulling the Rope should occur.
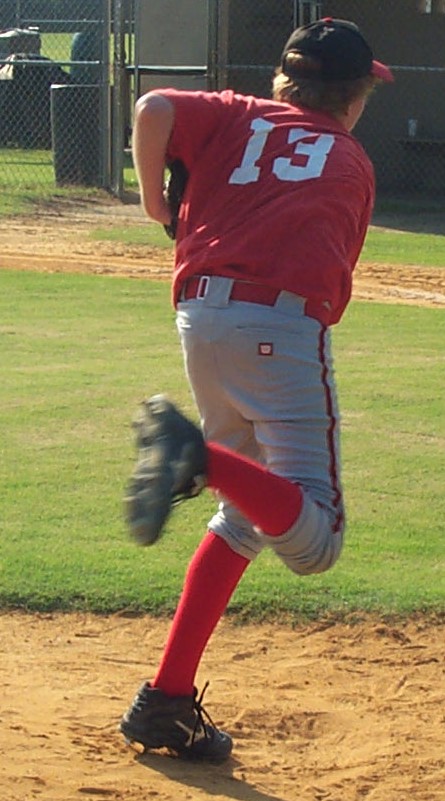
Now that we have pulled ourselves forward, we need to discuss our new body position. In Step Five, we were in the closed (to the catcher) position. When pulling the rope, we have now rotated open to the catcher. When rotating, we will pivot on both feet for this Step. Both the front foot and the back foot will rotate to point directly at the target. In fact, you will remain on both of the balls or pads of the feet. This is now OK because now we are throwing; we are bringing the pitch right now. When rotating, it is important to note that your spine will stay upright, and you will remain tall in Step Six. Your upper body will rotate and move forward until you are square to the plate, square inside the walls and your nose is over your toes with a slightly bent front knee. I want to express that at this point you can check for a level body. We want to be level in three locations: our hips, our shoulders, and our eyes.
It is easy to see that the hips would be level. And it is easy to keep them level while pitching. The real work to be done comes when we speak about the head and eyes.
With our body now open to the plate, both feet pointing at the target, hips, shoulders, eyes level, spine upright, and with our nose over our toes, it is now time to discuss the arm action. Listen to this very important sentence. The throwing arm does nothing from Step Five to Step Six. I must be out of my mind, right? We are throwing the pitch, and how can the arm do nothing? Let me clarify, the throwing arm is along for the ride. When in Step Five, the arm is in that "elbow as high as the shoulder, 90-degree ball facing away from your heart position". Here in Step Six, you have rotated your body and the arm remains exactly where it was at in relation to the shoulder and body. The elbow should remain at the same height, forearm in the 90-degree position, wrist neutral and you guessed it, the ball facing away from your heart. For righty's, the ball will be facing third base. Conversely, for lefties, the ball will be facing first base.
A lot of younger pitchers tend to twist or rotate the ball from Step Five toward the catcher. They think that for some reason that they need to get the ball facing in the direction that they are throwing. This twisting causes the throwing elbow to drop during the throw. Nothing could be worse than a drop of the elbow. We are not Second-basemen. We are pitchers trying to get everything on the pitch that we can. My father always asked us that if we wanted to hit something, would we hit it with a big stick or a little stick. Obviously, we would hit it with a big stick. Therefore, we should keep the throwing arm large and in a strong position. If we look at this idea of the ball always facing away from our heart, then when we finally finish the pitch in Step Seven, the throwing shoulder will be pointing toward the target and thus the ball will be facing the target. This concept is really important to getting that little extra on our fastball. But if learned early enough in life, a good habit can be created and kept for a career. View Pictures.
Step Seven
Step Seven is the Finish. Three main things happen in Step Seven. First, I
would like to discuss the upper body and chest. My father always told us that
there was a "Knee to Chest Relationship" that we needed to have.
By this he meant that your chest needed to get down onto your front knee.
There needs to be a bend in your body at the waist that allows your chest
to get over the front of your front foot, reaching toward the plate. When
you reach forward with your chest in Step Seven, your head will be out in
front with your back flat or parallel to the ground. It is very important
to note here that if you do not bend your front knee, you will not be able
to get the chest onto the knee.
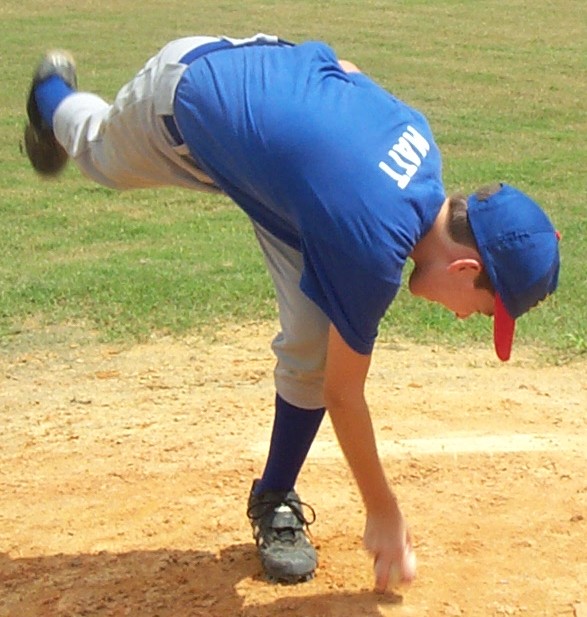
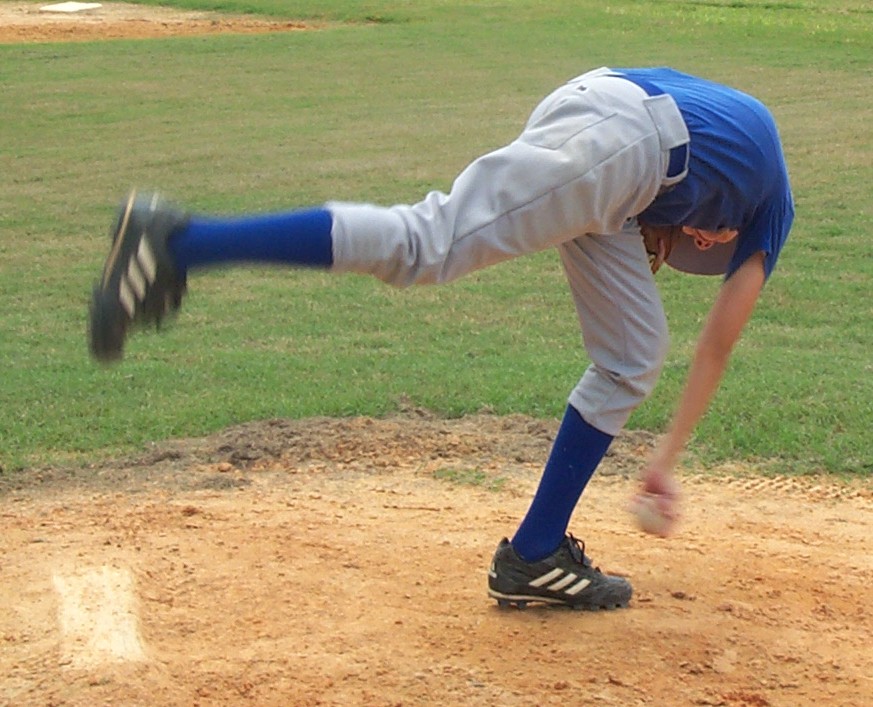
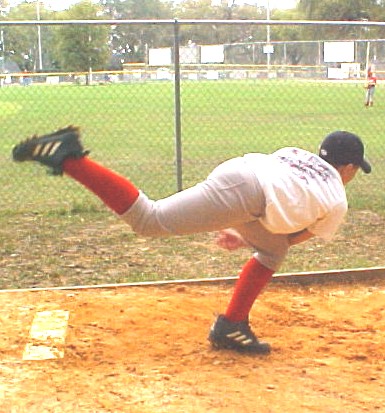
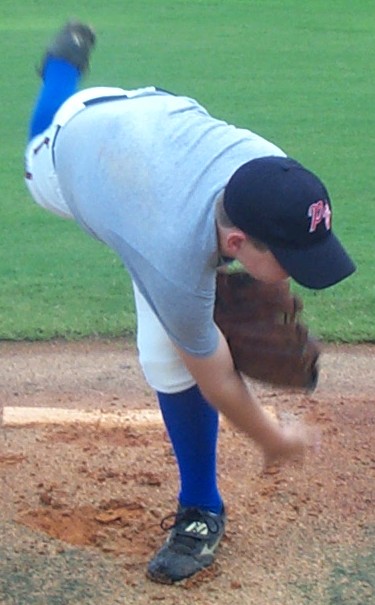
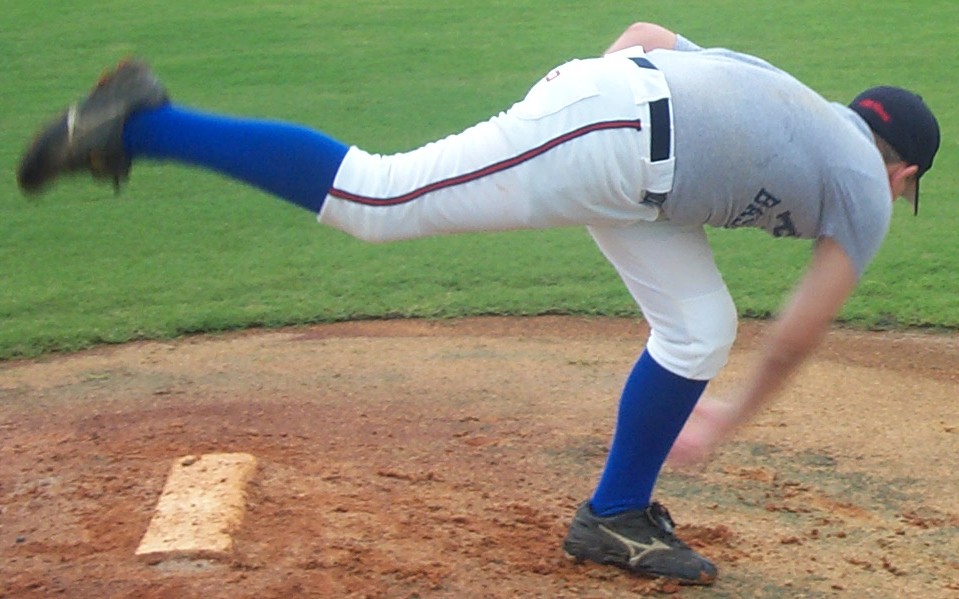
The throwing arm is now ready to release the pitch. But release the pitch with a goal in mind. We teach our pitchers to imagine that they have a knife in their throwing hand. With this thought, they will then cut the catcher in half vertically down from top to bottom. We want to imagine splitting him on every pitch that we throw. We used this concept at Alabama and it worked wonders. I believe that where the hand is going, a very large percentage of the pitches will go as well. For younger pitchers, this is a great concept to teach. They increase their focus on every pitch and can see their results from the first time they try it. For me it was mainly mental focus enhancement. I was able to split the catcher in half every time with my pitches. You will be surprised to see how useful and successful this is for the younger guys. They love it. It is also a time for me to get them to finish the pitch from an arm action point of view. Young and experienced pitchers alike seem to take a vacation on some pitches. They seem to not finish a pitch once in a while. This problem can be eliminated if they think about cutting the catcher in half on every pitch. For the younger pitchers, I ask them to cut the target in half on every throw that they make in every instance. Just like Pulling the Rope, they need to be working on this every throw for the rest of their career. Their hard work will pay dividends in the long run. How can cutting the target in half cause any problems from playing other positions? It simply cannot.
Interestingly enough, when adding some extra power to a pitch, I ask the pitcher to treat his head and heart just like the knife in Step Seven. Therefore, we cut the target in half with head, heart and hand. This cutting action can only help improve the ability to stay inside the walls and know where the pitch is going. And this thought can't hurt on adding to the fastball. Any acceleration is more mph's for the pitch.
For the parents that want a less violent approach to this concept, we use the paint brush idea. We imagine a paint brush in the throwing hand and simulate painting the catcher from top to bottom. Either idea is great, you get the point.
Finally, when we are throwing, we need to put the Knee to Chest Relationship together with the Cutting the Catcher in Half and accentuate the finish. The easiest way to do this is to touch the ground with our throwing hand after throwing the ball. I will guarantee that anyone who touches dirt has gotten their chest down, reached to the plate and has cut the catcher all the way in half. Now in the game, we will not touch the dirt. We want to get our throwing elbow to be even with our bent front knee.
When all of this is done correctly, you will have accelerated the arm all of the way through the pitch.
If you haven't noticed, the actual release of the ball is out in front of your head, body and most importantly, your front foot. This is called reaching. You will feel yourself reach out and hand the ball to the catcher. Also, part of reaching includes the back hip. The ability to get the entire backside to come over the front leg helps finish the pitch. Notice that we want everything to go over the front leg, not around it. We are to live inside the walls in every Step. There is a lot more power created from going over the front leg than from going around. View Pictures.
Using the Seven Steps
Using the Seven Steps correctly is as important as learning them. If they are misused or not practiced all the time, you can lose that edge that you worked so hard to get. For the younger pitchers, it is important to keep the Seven Steps the focus each day of the season and in the off-season. Please keep in mind that the Seven Steps are not for the game. They are merely tools to separate the pitching delivery into easier parts in order to refine our body to reach maximum potential. If you try to think of the Seven Steps in the game you will lose focus of the batter and the goals that you had for that day. If thought of during the game, you also run the risk of getting in your own head, which is basically being distracted by mechanics instead of trying to get batters out. This happened to me when I first learned the Seven Steps. I found that I was so caught up in trying to perfect my delivery and conform to the Seven Steps, that I was giving up too many hits in the meantime. I like to use the old saying that, "The game time is the time to dance with the girl that you brought." Whatever mechanics you have that day, you need to stay with them. Getting batters out is your primary goal. If you don't have the mechanics that you like, then try working at home a lot more.
Now to leave behind the Seven Steps completely and just pitch out of control is wrong also. There comes a point in time that you need to make fine tuning adjustments to your delivery. The time to make these adjustments is during your warm-up pitches between each inning. I like to think of this time as the quick study period just before the test. Each inning that you take the hill, you should know who the batters are. The next item to think about is what the coach told you that were your mistakes from the last inning. These mistakes may be mechanical and they may be mental. Regardless, the next five warm-up pitches are the time for you to prepare for the inning ahead.
The Seven Steps are also rather choppy in comparison to your normal delivery. When working on the Seven Steps, you are isolating each part of your body in order to refine its positions or movements. As pitchers, we are very outcome-oriented and are trained to move at top speed. Being able to slow down your motion to understand its movements is difficult to say the least. But in the end, understanding the concept of how your body delivers the ball will pay off.
From the choppy, robotic movements of your Seven Steps workouts, you need to regain a smooth, effortless delivery. To do this you must practice even more. But, the key here is to work in the mirror so that you can see where your improvements are needed. If you are at stage that you are ready to start making your motion smooth for the game, then you will be able to recognize your own mechanical flaws. Working in the mirror in order to smooth out your delivery should be done at a slow speed. If you attempt to go from the Seven Steps to a game throw without smoothing out the delivery, you will again be stepping backward. You need to work on your delivery until it becomes smooth enough that you cannot see the break points between the Seven Steps. This will come with time so be patient. A good tool for this is to be filmed or videotaped. A lot of what we do as pitchers relies upon feeling rather than how we look. Watching yourself deliver a pitch can iron out some of the mechanical flaws that feel comfortable to you.
The next point here is how the Homework and Drills relate to using the Seven Steps. The Seven Steps were only created and are only used so that a pitcher can break down the entire delivery to work on each portion of the delivery individually. Some drills are designed to assist with the Steps themselves. Other drills may work to improve the delivery motion, whereas some drills are designed to improve the complete pitcher with game-type situations. Whether you are improving fundamentals or adding power or speed to a pitch, the drills are as important as improving the Seven Steps. It is imperative to keep a balance between drills and the Seven Steps. Just because you think that you know the Steps, it does not mean that you move onto the drills. Even when we were at Alabama, we worked on the Seven Steps for a couple of hours each day. It is important for you to do the same!

Contact Coach Andy Bernard
or visit
www.sevenstepsofpitching.com
